Lynne's Blackwork Design - TGOSM April '08
Here's the first in the four sewing accessories I finished for Lynne last month. All will be featured at TGOSM, and this one was already published at April 2008 issue. I was such in a hurry to finish them that I didn't able to take photos of the step-by-step finishing instructions. I told Kirsten I'll post a pictorial instruction here at my blog after each publish/release, so here it is.
Please be advise that the finishing below is applicable to mounted ornaments and neck pockets as well.
 My Pocket Ornament Complimentary Model
SEWING NECESSAIRE / MOUNTED ORNAMENT / NECK POCKET
Materials & Tools Needed:
1. stitched piece - maximum 4” x 4”
2. backing material - at least 6” x 12”
3. thick batting or wadding - 4.5” x 8.5”
4. acid free mat board - at least 4” x 8”
5. wool felt - 3” x 4”
6. coordinating thread - for slipstitching
7. needles (1 for hand-sewing & 1 with big eye for a 5 mm ribbon)
8. scissors, tacky glue, pins, ruler & pen
9. embellishments: 6”-5mm (or thicker) ribbon, 6”-decorative trimmings (for pocket lip), at least 22”-fused beads (for decorative edge), and 1 pc-coordinating button (optional)
Note: If fused beads is not available, replace it with twisted cording...


Finishing Instruction:
1. Iron stitched piece & backing fabric if necessary.
1. Iron stitched piece & backing fabric if necessary.
2. Measure and cut 2 pieces of 4” x 4” acid free mat board. I love signing (most of the time) my mat board with a wish for GOODLUCK. For this piece, I signed "WORLD PEACE".


3. Apply glue on one side of both 4” x 4“ mat boards then stick/attach them to the wadding. Trim wadding to the same size as mat boards.


4. Lay the backing fabric with good side up. Measure 7” then fold, good sides facing each other. From the folded part, measure 3” then fold it down. This will serve as the pocket later on. You should now have a 6” x 6” backing fabric. Pin the sides if necessary. (Note: for finishing a mounted ornament, omit step 4, 5 & 10, just simply cut a 6" square backing fabric then proceed to step 6 to 9.)


6. With your stitched piece facing down, put the padded mat board on top of it and make sure it is centered. Apply glue at the edges of unpadded mat board then stretch and attach the stitched piece onto it. While the glue is still wet, check again if the stitched piece is centered. Make sure it’s on the right place at this point. Do the same procedure with the backing fabric.


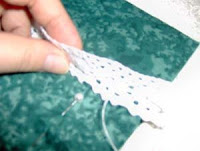
8. Using headpins, mark one edge with 0.5” intervals... one side at a time as you go along attaching the fused beads. You can start at either top-right or top-left clockwise. For a scalloped effect, count out 4 beads then slipstitch at 0.5” interval.


9. The hanger of model piece has a 4” drop-down length as I finished it into a pocket ornament. If you want to use it as a neck-pocket, simply increase the hanger drop-down length to 18” or to your desired length. Or if you just want to put it in your sewing basket, no hanger is necessary. That's how I finished Lynne's blackwork.


10. Fold wool felt cross-wise (size will become 2” x 3”) giving you a couple needle pages, then place spine underneath the decorative trim. Attach it using the button & ribbon. Either button or ribbon alone will work as well. Note: This step can be done after step 5, but I always prefer to do it last to make sure attachments are all centered.


11. Your sewing necessaire is now waiting to be filled with your stitching knick-knacks.


I've made a bunch of neck pockets in the past using the above technique. Example of which are the quaker hearts from TGOSM. Check out my online gallery to see a finished product.
Should you have any queries with regards to the above finishing, drop me a line or 2 and I will do my best to clarify it for you. Hope to see your finished piece soon using the above finishing!
IMPORTANT: My finishing instructions are copyrighted, so please do not post them elsewhere. Thank you so much!


4 comments:
Beautiful Lody. Thank you for the tutorial.
Lody! What a lovely piece and thanks fo the tutorial too! Gonna take a serious look at it! Just looking now......
Beautiful work! Thank you for posting a tutorial :)
Great set of instructions, Lody.
Post a Comment